Guide de configuration des protocoles email de Red Sift

- Learn more about DKIM
- Why is DKIM key rotation important?
- How often should DKIM keys be rotated?
- What’s a long DKIM Key?
- What is DKIM canonicalization?
- What is a DKIM selector?
- What is the l= tag in DKIM?
- What are the security concerns around using the l= tag in DKIM?
- What is DKIM Header oversigning?
- What is a DKIM replay attack?
- How does DKIM help with forwarded mail?
- Can an email contain more than one DKIM signature i.e. be DKIM signed multiple times?
- How does ARC come into play when DKIM or DMARC fail?
- Common DKIM misconfigurations
- DKIM recommendations summary
- Technical DKIM configuration tips
- Generating 2048 bits DKIM public and private keys using OpenSSL on a Mac
Learn more about DKIM
Why is DKIM key rotation important?
You can rotate DKIM keys by simply replacing the old pair with a new one to authenticate DKIM emails. If a threat actor steals or deciphers your private key, they won’t be able to use it for long if you practice regular DKIM key rotation.
In addition, regularly updating your DKIM keys increases your domain’s email deliverability rate.
How often should DKIM keys be rotated?
It’s generally suggested to rotate DKIM keys every 6 to 12 months. Frequent rotation stops hackers from intercepting and decoding your cryptographic keys. Less frequent rotation (say, once every couple of years) makes your domain more susceptible to the risk of intercepted or decoded keys.
What’s a long DKIM Key?
Some DNS editors can receive errors when DKIM keys or other TXT entries are longer than 255 characters.
To resolve this issue, you can enter your DKIM key by breaking it up into pieces on a single TXT entry.
For example, if your DKIM key is:
"v=DKIM1; k=rsa; p=abcdefghijklmnopqrstuvwxyzabcdefghijklmnopqrstuvwxyzabcdefghijklmnopqrstuvwxyzabcdefghijklmnopqrstuvwxyzabcdefghijklmnopqrstuvwxyzabcdefghijklmnopqrstuvwxyzabcdefghijklmnopqrstuvwxyzabcdefghijklmnopqrstuvwxyzabcdefghijklmnopqrstuvwxyzabcdefghijklmnopqrstuvwxyzabc"
You can enter it as:
"v=DKIM1; k=rsa; p=abcdefghijklmnopqrstuvwxyzabcdefghijklmnopqrstuvwxyzabcdefghijklmnopqrstuvwxyzabcdefghijklmnopqrstuvwxyzabcdefghijklmnopqrstuvwxyz" "abcdefghijklmnopqrstuvwxyzabcdefghijklmnopqrstuvwxyzabcdefghijklmnopqrstuvwxyzabcdefghijklmnopqrstuvwxyzabcdefghijklmnopqrstuvwxyzabc"
You can divide them at arbitrary places. The double quote enclosed parts should be separated by a single space character, not a new line.
What is DKIM canonicalization?
Canonicalization is a process whereby the headers and body of an email are converted to a canonical standard form before being DKIM signed. This can be thought of as converting data into a standard canonical form.
Some mail systems, such as forwarders, modify emails in transit that can potentially invalidate the DKIM signature applied. While some DKIM signers may accept minor mail modifications, others may be more strict and require stricter canonicalization.
Two canonicalization algorithms have been created to satisfy mild modification to a message and almost no modification to a message before signing. The two canonicalization algorithms are relaxed and simple respectively.
From DKIM’s perspective, the headers and body of an email are separate and canonicalization algorithms are specified for both, one for the headers and another for the body.
They are represented in the format of canonicalization/canonicalization for the header and body respectively. If no canonicalization is specified then simple is used for both headers and body, so it would look like this: simple/simple.
The simple/simple canonicalization is the stricter of the two and allows for almost no modification to the message header and body. However, this can affect the DKIM signature being invalidated by some forwarders as the email passes through them. Many of the issues with DKIM being invalidated during forwarding can be solved if the canonicalization is changed to relaxed/relaxed to allow for mild modifications to the emails.
What is a DKIM selector?
A DKIM selector is a string that points to a specific DKIM public key record in your DNS. It is specified as s= tag in the DKIM-Signature header field and can be found in the technical headers of an email.
Validation on the receiver side uses the selector in combination with the signing domain in order to carry out a DNS query and find the public key in your DNS.
For example:
“selector”._domainkey.yourdomain
When the receiver retrieves the public key it uses it to verify the DKIM signature.
No two services should use the same selector. For example, if you are sending emails from a number of services on behalf of your domain such as Google, Mailchimp, Salesforce, and Sendgrid, each one must use a unique key and selector in your DNS. If the selectors were the same the recipient would not be able to tell which key to use to decipher a particular email.
What is the l= tag in DKIM?
The l= tag in DKIM specifies the length of the message body that should be included in the DKIM hashing and signing process. This means that only the specified portion of the message body is signed, while the remainder is not included in the cryptographic signature.
This tag is optional. If it is not used, the entire message body is included in the signature by default.
What are the security concerns around using the l= tag in DKIM?
When the l= tag is used in DKIM, only a specified portion of the message body is included in the cryptographic signature, leaving the rest unsigned. This creates a security risk, as attackers can modify the unsigned portion of the message without invalidating the DKIM signature.
This vulnerability means that an attacker could intercept a legitimate email from a reputable sender, append malicious content to the unsigned part of the message, and resend it to a recipient who trusts the sender. Such an attack could damage the reputation of the sending domain and potentially deceive recipients.
To mitigate this risk, it is recommended not to use the l= tag in your DKIM signing process. Additionally, audit your vendors to ensure they are not including this tag when sending emails on your behalf.
What is DKIM Header oversigning?
DKIM is used to sign specific headers or parts of the email body, such as the "From," "Subject," and other headers, to verify the identity of the sender and ensure the integrity of the message. If a signed header is modified after being sent, the DKIM verification will fail.
Attackers may attempt to inject additional headers into an email or modify existing ones for malicious purposes. Oversigning common headers, such as "From," "Subject," "Reply-To," etc., can help protect your emails from manipulation and replay attacks. Oversigning means that you include multiple instances of the same header, effectively signing each one to prevent tampering.
By sending a test email to Red Sift’s Investigate tool, you will be able to see what headers are DKIM signed in your email and if you are oversigning.
What is a DKIM replay attack?
A DKIM replay attack is a type of email attack in which an attacker takes a legitimate, DKIM-signed email and resends it to multiple recipients. The attacker exploits the DKIM signature, which verifies the email's authenticity and integrity, to benefit from the original sender's reputation. This increases the likelihood that the replayed email will bypass spam filters and land in the recipients' inboxes, as it appears to come from a trusted source.
How does DKIM help with forwarded mail?
DKIM helps with forwarded mail by providing a mechanism to verify the authenticity and integrity of an email, even after it has been forwarded. Forwarding can often alter email headers, which can cause issues with other email authentication methods like SPF (Sender Policy Framework).
Without DKIM, forwarded emails may fail to reach the recipient's inbox, especially if the sender's domain is protected by a strict DMARC (Domain-based Message Authentication, Reporting, and Conformance) policy. This is because SPF authentication often fails during forwarding, and without both SPF and DKIM, a DMARC policy of p=reject will instruct the recipient's server to reject the email.
It is strongly advised not to set a DMARC policy of "reject" without first implementing an aligned DKIM signature for all your email sending systems. This ensures that at least one authentication mechanism remains intact when SPF fails.
However, it's important to note that DKIM can also fail when an email is forwarded, particularly if the forwarder modifies any of the DKIM-signed headers or the body of the email. This can happen due to email security gateways, external disclaimer banners, or other modifications introduced during the forwarding process.
Can an email contain more than one DKIM signature i.e. be DKIM signed multiple times?
Yes, an email can contain multiple DKIM signatures, and this is quite normal. This typically occurs when an email passes through different systems that each apply their own DKIM signature. For example, an email service provider (ESP) might add a DKIM signature to track reputation feedback, and another DKIM signature might be added when the email is sent from one system to another on its way out to the internet. If both systems are configured to DKIM sign emails, the email will end up with multiple DKIM signatures.
It's important to note that one of the signatures may fail (often the first one, if the email is modified between the initial and subsequent signing), but as long as at least one signature passes verification, the DKIM check will be considered successful.
How does ARC come into play when DKIM or DMARC fail?
As mentioned earlier, DKIM may fail when an email is forwarded. ARC (Authenticated Received Chain) addresses the limitations of DKIM and DMARC in scenarios involving email forwarding and mailing lists by preserving the original authentication results through a sequence of cryptographic signatures, creating a chain of custody.
ARC helps ensure that legitimate emails can be trusted and delivered, even if modifications by intermediaries cause DKIM or DMARC failures. It does this by allowing the forwarding server to attest to the original authentication results and the integrity of the message when it was first received.
However, the use of ARC relies on the email forwarder to implement it, establishing this chain of custody. Even if an email passes ARC, it does not necessarily guarantee that the email will be trusted or delivered to the recipient's inbox. The final decision lies with the receiving system, which determines whether to trust the established chain of custody.
Common DKIM misconfigurations
- Using Weak or Deprecated Cryptographic Algorithms: Avoid using DKIM keys that are less than 1024 bits. A 2048-bit key is recommended for stronger security. Additionally, ensure you use up-to-date cryptographic algorithms, such as
rsa-sha256. - Not Splitting Longer Keys Correctly in DNS: When publishing a 2048-bit key in DNS, it may be necessary to split the key into multiple DNS records if your DNS host does not automatically handle this. Failure to do so can result in DKIM verification failures. Refer to the specific guidance or examples provided for splitting keys correctly.
- Enabling DKIM in a Third-Party System Without Publishing the Corresponding Public Key: DKIM relies on a private/public key pair. The sender (e.g., a third-party vendor) holds the private key, which is used to sign outgoing emails. It is crucial to publish the corresponding public key in your domain's DNS records, provided by the vendor, to enable proper DKIM verification.
- Missing Required Tags in a DKIM Record: Ensure that your DKIM record begins with
v=DKIM1;. This is a required tag that identifies the record as a DKIM record. - Using the Wrong Record Type: Make sure to publish your DKIM record using the correct DNS record type, such as TXT or CNAME, as specified by the third-party sender. Some providers may require a TXT record for DKIM, while others might use CNAME. Additionally, some vendors, like Microsoft 365 or Amazon SES, may provide multiple DKIM records to facilitate easy key rotation and management.

DKIM recommendations summary
- Oversign email headers.
- Rotate DKIM keys at least once a year.
- Use strong keys (at least 1024-bit) and up-to-date algorithms.
- Avoid using the l= tag.
- Remove unused DKIM records from DNS.
- Implement DMARC with DKIM for better insight and protection.
Technical DKIM configuration tips
Generating 2048 bits DKIM public and private keys using OpenSSL on a Mac
Learn how to generate 2048 bits DKIM public and private keys using the Mac terminal and create a DNS record.
How to generate the private and public keys
- Open the terminal and type
openssl - To generate a private key type:
openssl genrsa -out private.key 2048 - To generate a public key from the private key type:
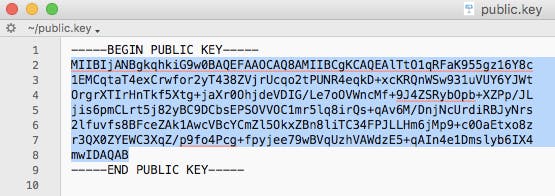
openssl rsa -in private.key -pubout -out public.key - Find the folder that contains your public key and open it. It should look something like the image below.
- Manually convert the highlighted text above to a single line ie. remove the spaces between new lines.
How to create the DNS record
The generated 2048-bit DKIM public key is too long to fit into a single TXT DNS record. A DNS record can be up to 255 characters. Therefore your public key will need to be split into two separate TXT records using quotes and slash or brackets and quotes as shown below.
Note: this depends on your DNS provider.
TXT"part one" \ "part two"TXT( "part one" "part two" )
To create the DNS record you will have to specify the Name, Type, and Value of the DNS record.
The DNS record Name will look like this:
selector._domainkey.domain
Where the selector is defined by you and can be called anything, for example, the date, device, or service that will sign the emails.
For example:
20180719._domainkey.redsift.io
The DNS record Type is TXT.
The DNS record Value should look like the examples below. The part in bold is copied from the generated public key file and remember that you will need to split the public key into two records.
Splitting examples
Example 1 using quotes
TXT record 1:
“v=DKIM1; k=rsa; p=MIIBIjANBgkqhkiG9w0BAQEFAAOCAQ8AMIIBCgKCAQEAlTtO1qRFaK955gz16Y8c1EMCqtaT4exCrwfor2yT438ZVjrUcqo2tPUNR4eqkD+xcKRQnWSw931uVUY6YJWtOrgrXTIrHnTkf5Xtg+jaXr0OhjdeVDIG/Le7oOVWncMf+9J4ZSRybOpb+XZPp/JLjis6pmC”
TXT record 2:
“Lrt5j82yBC9DCbsEPSOVVOC1mr5lq8irQs+qAv6M/DnjNcUrdiRBJyNrs2lfuvfs8BFceZAk1AwcVBcYCmZl5OkxZBn8liTC34FPJLLHm6jMp9+c0OaEtxo8zr3QX0ZYEWC3XqZ/p9fo4Pcg+fpyjee79wBVqUzhVAWdzE5+qAIn4e1Dmslyb6IX4mwIDAQAB”
Example 2 using brackets and quotes
TXT record 1:
(“v=DKIM1; k=rsa; p=MIIBIjANBgkqhkiG9w0BAQEFAAOCAQ8AMIIBCgKCAQEAlTtO1qRFaK955gz16Y8c1EMCqtaT4exCrwfor2yT438ZVjrUcqo2tPUNR4eqkD+xcKRQnWSw931uVUY6YJWtOrgrXTIrHnTkf5Xtg+jaXr0OhjdeVDIG/Le7oOVWncMf+9J4ZSRybOpb+XZPp/JLjis6pmC”
TXT record 2:
“Lrt5j82yBC9DCbsEPSOVVOC1mr5lq8irQs+qAv6M/DnjNcUrdiRBJyNrs2lfuvfs8BFceZAk1AwcVBcYCmZl5OkxZBn8liTC34FPJLLHm6jMp9+c0OaEtxo8zr3QX0ZYEWC3XqZ/p9fo4Pcg+fpyjee79wBVqUzhVAWdzE5+qAIn4e1Dmslyb6IX4mwIDAQAB”)
Questions fréquemment posées : Guide de configuration des protocoles email
À l’époque pré-DMARC, les enregistrements SPF utilisaient couramment le mécanisme « -all » pour appliquer strictement les politiques d’expéditeur. Cependant, les recommandations actuelles de l’industrie en 2026 privilégient « ~all » pour équilibrer sécurité et délivrabilité, évitant le rejet inutile d’emails légitimes qui pourraient échouer au SPF mais réussir le DKIM et DMARC.
Cela s’explique car « ~all », lorsqu’il est mis en œuvre avec DMARC (à p=reject), permettra toujours de rejeter le courrier non authentifié si SPF et DKIM échouent, sans pour autant bloquer les emails légitimes, ce qui améliore la délivrabilité globale.
La spécification DMARC (RFC 7489) précise qu’un préfixe « - » sur le mécanisme SPF de l’expéditeur, comme « -all », peut déclencher un rejet anticipé, donc avant toute analyse DMARC. Utilisez « -all » uniquement pour les domaines inactifs qui n’envoient jamais d’emails. DMARC ne tient pas compte des nuances entre soft fail et hard fail dans la configuration SPF, les considérant tous deux comme des échecs SPF.
DMARC ne nécessite pas seulement que SPF ou DKIM passe, mais exige aussi qu’au moins un des domaines utilisés par SPF ou DKIM s’aligne avec le domaine trouvé dans l’en-tête From. Un alignement correct est essentiel pour la délivrabilité email en 2026, car les principaux fournisseurs de messagerie imposent désormais ces exigences.
Pour SPF, l’alignement des identifiants signifie que la vérification MAIL FROM/Return-PATH doit passer et que la partie domaine du MAIL FROM/Return-PATH doit correspondre au domaine de l’adresse From. En mode d’alignement strict, les domaines doivent être identiques alors qu’en mode relâché, les sous-domaines sont également acceptés tant qu’ils appartiennent au même domaine organisationnel.
Par exemple, si le MAIL-FROM/RETURN-PATH est @ondmarc.com et que l’en-tête From est @knowledge.ondmarc.com, ils ne sont pas alignés en mode strict. Cependant, en mode relâché, DMARC validerait l’email.
Un rapport agrégé DMARC contient des informations sur l’état d’authentification des messages envoyés au nom d’un domaine. Il s’agit d’un rapport de retour XML conçu pour offrir une visibilité sur les emails ayant passé ou échoué aux contrôles SPF et DKIM. Ce rapport offre aux propriétaires de domaine une vision précise des sources qui envoient en leur nom et du sort réservé à ces emails (la politique appliquée par le récepteur).
Les destinataires consulteront le tag 'rua' de votre enregistrement DMARC pour envoyer les rapports. Vous pouvez spécifier l’intervalle des rapports agrégés avec le tag ri dans votre enregistrement DMARC (par défaut, défini à 86400 secondes, soit 24h). Les rapports médico-légaux contiennent des informations plus détaillées sur chaque échec d’authentification. Toute information personnelle est retirée, mais les données utiles à l’investigation du problème DMARC sont incluses, comme les informations d’échec d’en-tête SPF et DKIM, l’adresse complète de l’expéditeur et l’objet du courriel.
L’adresse de réception des rapports médico-légaux DMARC est spécifiée par le tag 'ruf' de votre enregistrement. Tous les systèmes destinataires ne prennent pas en charge l’envoi de rapports médico-légaux. Red Sift OnDMARC est l’une des rares solutions DMARC du marché à les recevoir grâce à son partenariat avec Yahoo.
Une macro SPF désigne un mécanisme utilisé dans les enregistrements SPF permettant de définir des ensembles réutilisables d’adresses IP. Les macros SPF offrent une flexibilité et une maintenabilité accrues en permettant de définir des ensembles complexes d’IP dans un seul mécanisme, qui peut ensuite être référencé dans plusieurs enregistrements SPF. Par exemple, au lieu d’énumérer chaque adresse IP autorisée, vous pouvez définir une macro comme « %{i} » qui fait appel à l’IP d’expédition de l’email. Gérer SPF de cette manière offre un meilleur contrôle sur de grandes listes IP sans dépasser la limite de consultation SPF, tout en masquant les IP autorisées lors d’une requête publique.
Cependant, selon la structure de l’enregistrement SPF avec macros, l’absence de développement des macros peut entraîner des échecs SPF ou des résultats « Neutre » (notés ?all). Si les macros SPF jouent un rôle clé dans l’autorisation de serveurs d’envoi légitimes, les emails risquent de plus facilement échouer aux contrôles SPF ou d’être considérés comme suspects par les systèmes utilisant SPF pour l’authentification.
Mail Transfer Agent Strict Transport Security (MTA-STS) est une norme qui permet de chiffrer les messages envoyés entre deux serveurs de messagerie. Elle indique aux serveurs expéditeurs que les emails ne peuvent être transmis qu’en connexion sécurisée via Transport Layer Security (TLS), empêchant ainsi l’interception par des cybercriminels.
L’adoption de MTA-STS a fortement progressé, les organisations en 2026 considérant la sécurité de la couche transport comme essentielle pour protéger les emails en transit. Pour activer MTA-STS sur un domaine destinataire, il faut annoncer la prise en charge MTA-STS dans le DNS et publier un fichier de politique sur son site web.
L’activation de MTA-STS doit se faire avec précaution afin d’éviter de bloquer la réception d’emails. Il est conseillé de d’abord déployer MTA-STS en mode test, afin que les rapports TLS permettent de détecter et corriger les éventuelles erreurs avant de passer à l’application stricte. Cette démarche progressive deviendra probablement la norme en 2026 pour les organisations renforçant la sécurité du transport.
Le SMTP TLS Reporting (ou TLS-RPT) permet de rapporter les problèmes de connectivité TLS rencontrés par les MTAs expéditeurs, conformément à RFC8460. À l’instar de DMARC, TLS-RPT utilise des rapports transmis par email pour avertir le propriétaire d’un domaine en cas d’échec de livraison dû à des problèmes TLS. Ces rapports incluent les politiques MTA-STS détectées, des statistiques de trafic, les connexions échouées et les raisons de l’échec.
Avec la fonction MTA-STS de Red Sift OnDMARC, vous n’avez plus besoin de gérer un déploiement complexe. Il suffit simplement d’ajouter les Smart Records MTA-STS fournis par OnDMARC à votre DNS et Red Sift prend en charge tout le reste : hébergement du fichier de politique MTA-STS, gestion du certificat SSL, et signalement de toute violation détectée via un rapport TLS. En 2026, les plateformes DMARC modernes incluent de plus en plus MTA-STS hébergé par défaut, facilitant ainsi le déploiement de la sécurité du transport.
Publié sous RFC 7671, DANE (DNS-based Authentication of Named Entities) introduit une nouvelle norme Internet pour établir une communication TLS entre client et serveur sans dépendre des Autorités de Certification (CA) classiques.
Le modèle traditionnel requiert qu’un CA puisse délivrer un certificat pour n’importe quel domaine. DANE procède autrement, s’appuyant sur l’infrastructure DNSSEC (Domain Name System Security Extensions) pour lier un nom de domaine à un certificat. DANE exploite le protocole DNSSEC existant pour garantir l’authenticité et l’intégrité des données reçues.
DANE introduit aussi un nouvel enregistrement DNS de type TLSA qui signale au client que le serveur supporte TLS. Il est recommandé de mettre en place à la fois MTA-STS et DANE. DANE est requis par de nombreuses administrations, en particulier dans l’UE pour les organismes publics.
DANE et MTA-STS ne sont utiles que si l’expéditeur les prend en charge, or beaucoup ne supportent qu’un seul de ces mécanismes. Déployer les deux améliore donc la sécurité générale. En 2026, les organisations mettent souvent d’abord en place MTA-STS pour une compatibilité maximale, puis ajoutent DANE là où le niveau de sécurité doit être renforcé.
La politique de sous-domaine permet aux administrateurs de protéger différents domaines et sous-domaines selon leur niveau d’avancement dans l’adoption de DMARC. Par exemple, si tous vos services d’envoi au nom du domaine principal sont bien configurés avec SPF et DKIM, vous pouvez protéger votre domaine principal avec une politique DMARC p=reject tout en utilisant p=none sur les sous-domaines, voire l’inverse.
Par ailleurs, si un de vos services d’envoi n’est pas compatible DMARC (il ne prend pas en charge SPF ou DKIM), vous pouvez décider de lui attribuer un sous-domaine dédié et une politique DMARC différente, sans pour autant que cela empêche la protection de vos autres domaines. Cela permet de répartir le trafic sur plusieurs sous-domaines et de protéger chacun en fonction de son besoin.