Red Sift Leitfaden zur E-Mail-Protokollkonfiguration

- Learn more about DKIM
- Why is DKIM key rotation important?
- How often should DKIM keys be rotated?
- What’s a long DKIM Key?
- What is DKIM canonicalization?
- What is a DKIM selector?
- What is the l= tag in DKIM?
- What are the security concerns around using the l= tag in DKIM?
- What is DKIM Header oversigning?
- What is a DKIM replay attack?
- How does DKIM help with forwarded mail?
- Can an email contain more than one DKIM signature i.e. be DKIM signed multiple times?
- How does ARC come into play when DKIM or DMARC fail?
- Common DKIM misconfigurations
- DKIM recommendations summary
- Technical DKIM configuration tips
- Generating 2048 bits DKIM public and private keys using OpenSSL on a Mac
Learn more about DKIM
Why is DKIM key rotation important?
You can rotate DKIM keys by simply replacing the old pair with a new one to authenticate DKIM emails. If a threat actor steals or deciphers your private key, they won’t be able to use it for long if you practice regular DKIM key rotation.
In addition, regularly updating your DKIM keys increases your domain’s email deliverability rate.
How often should DKIM keys be rotated?
It’s generally suggested to rotate DKIM keys every 6 to 12 months. Frequent rotation stops hackers from intercepting and decoding your cryptographic keys. Less frequent rotation (say, once every couple of years) makes your domain more susceptible to the risk of intercepted or decoded keys.
What’s a long DKIM Key?
Some DNS editors can receive errors when DKIM keys or other TXT entries are longer than 255 characters.
To resolve this issue, you can enter your DKIM key by breaking it up into pieces on a single TXT entry.
For example, if your DKIM key is:
"v=DKIM1; k=rsa; p=abcdefghijklmnopqrstuvwxyzabcdefghijklmnopqrstuvwxyzabcdefghijklmnopqrstuvwxyzabcdefghijklmnopqrstuvwxyzabcdefghijklmnopqrstuvwxyzabcdefghijklmnopqrstuvwxyzabcdefghijklmnopqrstuvwxyzabcdefghijklmnopqrstuvwxyzabcdefghijklmnopqrstuvwxyzabcdefghijklmnopqrstuvwxyzabc"
You can enter it as:
"v=DKIM1; k=rsa; p=abcdefghijklmnopqrstuvwxyzabcdefghijklmnopqrstuvwxyzabcdefghijklmnopqrstuvwxyzabcdefghijklmnopqrstuvwxyzabcdefghijklmnopqrstuvwxyz" "abcdefghijklmnopqrstuvwxyzabcdefghijklmnopqrstuvwxyzabcdefghijklmnopqrstuvwxyzabcdefghijklmnopqrstuvwxyzabcdefghijklmnopqrstuvwxyzabc"
You can divide them at arbitrary places. The double quote enclosed parts should be separated by a single space character, not a new line.
What is DKIM canonicalization?
Canonicalization is a process whereby the headers and body of an email are converted to a canonical standard form before being DKIM signed. This can be thought of as converting data into a standard canonical form.
Some mail systems, such as forwarders, modify emails in transit that can potentially invalidate the DKIM signature applied. While some DKIM signers may accept minor mail modifications, others may be more strict and require stricter canonicalization.
Two canonicalization algorithms have been created to satisfy mild modification to a message and almost no modification to a message before signing. The two canonicalization algorithms are relaxed and simple respectively.
From DKIM’s perspective, the headers and body of an email are separate and canonicalization algorithms are specified for both, one for the headers and another for the body.
They are represented in the format of canonicalization/canonicalization for the header and body respectively. If no canonicalization is specified then simple is used for both headers and body, so it would look like this: simple/simple.
The simple/simple canonicalization is the stricter of the two and allows for almost no modification to the message header and body. However, this can affect the DKIM signature being invalidated by some forwarders as the email passes through them. Many of the issues with DKIM being invalidated during forwarding can be solved if the canonicalization is changed to relaxed/relaxed to allow for mild modifications to the emails.
What is a DKIM selector?
A DKIM selector is a string that points to a specific DKIM public key record in your DNS. It is specified as s= tag in the DKIM-Signature header field and can be found in the technical headers of an email.
Validation on the receiver side uses the selector in combination with the signing domain in order to carry out a DNS query and find the public key in your DNS.
For example:
“selector”._domainkey.yourdomain
When the receiver retrieves the public key it uses it to verify the DKIM signature.
No two services should use the same selector. For example, if you are sending emails from a number of services on behalf of your domain such as Google, Mailchimp, Salesforce, and Sendgrid, each one must use a unique key and selector in your DNS. If the selectors were the same the recipient would not be able to tell which key to use to decipher a particular email.
What is the l= tag in DKIM?
The l= tag in DKIM specifies the length of the message body that should be included in the DKIM hashing and signing process. This means that only the specified portion of the message body is signed, while the remainder is not included in the cryptographic signature.
This tag is optional. If it is not used, the entire message body is included in the signature by default.
What are the security concerns around using the l= tag in DKIM?
When the l= tag is used in DKIM, only a specified portion of the message body is included in the cryptographic signature, leaving the rest unsigned. This creates a security risk, as attackers can modify the unsigned portion of the message without invalidating the DKIM signature.
This vulnerability means that an attacker could intercept a legitimate email from a reputable sender, append malicious content to the unsigned part of the message, and resend it to a recipient who trusts the sender. Such an attack could damage the reputation of the sending domain and potentially deceive recipients.
To mitigate this risk, it is recommended not to use the l= tag in your DKIM signing process. Additionally, audit your vendors to ensure they are not including this tag when sending emails on your behalf.
What is DKIM Header oversigning?
DKIM is used to sign specific headers or parts of the email body, such as the "From," "Subject," and other headers, to verify the identity of the sender and ensure the integrity of the message. If a signed header is modified after being sent, the DKIM verification will fail.
Attackers may attempt to inject additional headers into an email or modify existing ones for malicious purposes. Oversigning common headers, such as "From," "Subject," "Reply-To," etc., can help protect your emails from manipulation and replay attacks. Oversigning means that you include multiple instances of the same header, effectively signing each one to prevent tampering.
By sending a test email to Red Sift’s Investigate tool, you will be able to see what headers are DKIM signed in your email and if you are oversigning.
What is a DKIM replay attack?
A DKIM replay attack is a type of email attack in which an attacker takes a legitimate, DKIM-signed email and resends it to multiple recipients. The attacker exploits the DKIM signature, which verifies the email's authenticity and integrity, to benefit from the original sender's reputation. This increases the likelihood that the replayed email will bypass spam filters and land in the recipients' inboxes, as it appears to come from a trusted source.
How does DKIM help with forwarded mail?
DKIM helps with forwarded mail by providing a mechanism to verify the authenticity and integrity of an email, even after it has been forwarded. Forwarding can often alter email headers, which can cause issues with other email authentication methods like SPF (Sender Policy Framework).
Without DKIM, forwarded emails may fail to reach the recipient's inbox, especially if the sender's domain is protected by a strict DMARC (Domain-based Message Authentication, Reporting, and Conformance) policy. This is because SPF authentication often fails during forwarding, and without both SPF and DKIM, a DMARC policy of p=reject will instruct the recipient's server to reject the email.
It is strongly advised not to set a DMARC policy of "reject" without first implementing an aligned DKIM signature for all your email sending systems. This ensures that at least one authentication mechanism remains intact when SPF fails.
However, it's important to note that DKIM can also fail when an email is forwarded, particularly if the forwarder modifies any of the DKIM-signed headers or the body of the email. This can happen due to email security gateways, external disclaimer banners, or other modifications introduced during the forwarding process.
Can an email contain more than one DKIM signature i.e. be DKIM signed multiple times?
Yes, an email can contain multiple DKIM signatures, and this is quite normal. This typically occurs when an email passes through different systems that each apply their own DKIM signature. For example, an email service provider (ESP) might add a DKIM signature to track reputation feedback, and another DKIM signature might be added when the email is sent from one system to another on its way out to the internet. If both systems are configured to DKIM sign emails, the email will end up with multiple DKIM signatures.
It's important to note that one of the signatures may fail (often the first one, if the email is modified between the initial and subsequent signing), but as long as at least one signature passes verification, the DKIM check will be considered successful.
How does ARC come into play when DKIM or DMARC fail?
As mentioned earlier, DKIM may fail when an email is forwarded. ARC (Authenticated Received Chain) addresses the limitations of DKIM and DMARC in scenarios involving email forwarding and mailing lists by preserving the original authentication results through a sequence of cryptographic signatures, creating a chain of custody.
ARC helps ensure that legitimate emails can be trusted and delivered, even if modifications by intermediaries cause DKIM or DMARC failures. It does this by allowing the forwarding server to attest to the original authentication results and the integrity of the message when it was first received.
However, the use of ARC relies on the email forwarder to implement it, establishing this chain of custody. Even if an email passes ARC, it does not necessarily guarantee that the email will be trusted or delivered to the recipient's inbox. The final decision lies with the receiving system, which determines whether to trust the established chain of custody.
Common DKIM misconfigurations
- Using Weak or Deprecated Cryptographic Algorithms: Avoid using DKIM keys that are less than 1024 bits. A 2048-bit key is recommended for stronger security. Additionally, ensure you use up-to-date cryptographic algorithms, such as
rsa-sha256. - Not Splitting Longer Keys Correctly in DNS: When publishing a 2048-bit key in DNS, it may be necessary to split the key into multiple DNS records if your DNS host does not automatically handle this. Failure to do so can result in DKIM verification failures. Refer to the specific guidance or examples provided for splitting keys correctly.
- Enabling DKIM in a Third-Party System Without Publishing the Corresponding Public Key: DKIM relies on a private/public key pair. The sender (e.g., a third-party vendor) holds the private key, which is used to sign outgoing emails. It is crucial to publish the corresponding public key in your domain's DNS records, provided by the vendor, to enable proper DKIM verification.
- Missing Required Tags in a DKIM Record: Ensure that your DKIM record begins with
v=DKIM1;. This is a required tag that identifies the record as a DKIM record. - Using the Wrong Record Type: Make sure to publish your DKIM record using the correct DNS record type, such as TXT or CNAME, as specified by the third-party sender. Some providers may require a TXT record for DKIM, while others might use CNAME. Additionally, some vendors, like Microsoft 365 or Amazon SES, may provide multiple DKIM records to facilitate easy key rotation and management.

DKIM recommendations summary
- Oversign email headers.
- Rotate DKIM keys at least once a year.
- Use strong keys (at least 1024-bit) and up-to-date algorithms.
- Avoid using the l= tag.
- Remove unused DKIM records from DNS.
- Implement DMARC with DKIM for better insight and protection.
Technical DKIM configuration tips
Generating 2048 bits DKIM public and private keys using OpenSSL on a Mac
Learn how to generate 2048 bits DKIM public and private keys using the Mac terminal and create a DNS record.
How to generate the private and public keys
- Open the terminal and type
openssl - To generate a private key type:
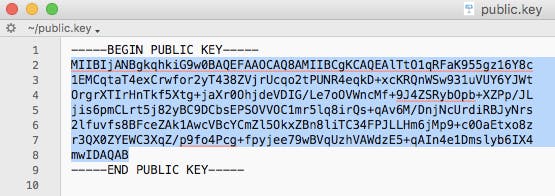
openssl genrsa -out private.key 2048 - To generate a public key from the private key type:
openssl rsa -in private.key -pubout -out public.key - Find the folder that contains your public key and open it. It should look something like the image below.
- Manually convert the highlighted text above to a single line ie. remove the spaces between new lines.
How to create the DNS record
The generated 2048-bit DKIM public key is too long to fit into a single TXT DNS record. A DNS record can be up to 255 characters. Therefore your public key will need to be split into two separate TXT records using quotes and slash or brackets and quotes as shown below.
Note: this depends on your DNS provider.
TXT"part one" \ "part two"TXT( "part one" "part two" )
To create the DNS record you will have to specify the Name, Type, and Value of the DNS record.
The DNS record Name will look like this:
selector._domainkey.domain
Where the selector is defined by you and can be called anything, for example, the date, device, or service that will sign the emails.
For example:
20180719._domainkey.redsift.io
The DNS record Type is TXT.
The DNS record Value should look like the examples below. The part in bold is copied from the generated public key file and remember that you will need to split the public key into two records.
Splitting examples
Example 1 using quotes
TXT record 1:
“v=DKIM1; k=rsa; p=MIIBIjANBgkqhkiG9w0BAQEFAAOCAQ8AMIIBCgKCAQEAlTtO1qRFaK955gz16Y8c1EMCqtaT4exCrwfor2yT438ZVjrUcqo2tPUNR4eqkD+xcKRQnWSw931uVUY6YJWtOrgrXTIrHnTkf5Xtg+jaXr0OhjdeVDIG/Le7oOVWncMf+9J4ZSRybOpb+XZPp/JLjis6pmC”
TXT record 2:
“Lrt5j82yBC9DCbsEPSOVVOC1mr5lq8irQs+qAv6M/DnjNcUrdiRBJyNrs2lfuvfs8BFceZAk1AwcVBcYCmZl5OkxZBn8liTC34FPJLLHm6jMp9+c0OaEtxo8zr3QX0ZYEWC3XqZ/p9fo4Pcg+fpyjee79wBVqUzhVAWdzE5+qAIn4e1Dmslyb6IX4mwIDAQAB”
Example 2 using brackets and quotes
TXT record 1:
(“v=DKIM1; k=rsa; p=MIIBIjANBgkqhkiG9w0BAQEFAAOCAQ8AMIIBCgKCAQEAlTtO1qRFaK955gz16Y8c1EMCqtaT4exCrwfor2yT438ZVjrUcqo2tPUNR4eqkD+xcKRQnWSw931uVUY6YJWtOrgrXTIrHnTkf5Xtg+jaXr0OhjdeVDIG/Le7oOVWncMf+9J4ZSRybOpb+XZPp/JLjis6pmC”
TXT record 2:
“Lrt5j82yBC9DCbsEPSOVVOC1mr5lq8irQs+qAv6M/DnjNcUrdiRBJyNrs2lfuvfs8BFceZAk1AwcVBcYCmZl5OkxZBn8liTC34FPJLLHm6jMp9+c0OaEtxo8zr3QX0ZYEWC3XqZ/p9fo4Pcg+fpyjee79wBVqUzhVAWdzE5+qAIn4e1Dmslyb6IX4mwIDAQAB”)
Häufig gestellte Fragen: Leitfaden zur E-Mail-Protokollkonfiguration
In der Zeit vor DMARC wurde in SPF-Einträgen häufig der Mechanismus „-all“ verwendet, um Absender-Policies strikt durchzusetzen. Die aktuellen Branchenempfehlungen für das Jahr 2026 bevorzugen jedoch „~all“, um Sicherheit und Zustellbarkeit ausgewogen zu gestalten und das unnötige Ablehnen legitimer E-Mails, die bei SPF durchfallen, aber DKIM und DMARC bestehen, zu vermeiden.
Der Grund dafür ist, dass „~all“ in Kombination mit DMARC (bei p=reject) weiterhin die Nichtzustellung von nicht-authentifizierten E-Mails ermöglicht, wenn SPF und DKIM fehlschlagen, ohne legitime E-Mails zu blockieren – dadurch wird die Gesamtzustellbarkeit verbessert.
Die DMARC-Spezifikation (RFC 7489) gibt an, dass ein Präfix „-“ beim SPF-Mechanismus des Absenders – wie „-all“ – dazu führen kann, dass eine E-Mail vorab abgelehnt wird, d.h. noch bevor DMARC greift. Verwenden Sie „-all“ nur für inaktive Domains, die nie E-Mails versenden. DMARC unterscheidet nicht zwischen Soft Fail und Hard Fail im SPF – beide werden schlicht als SPF-Fehler gewertet.
DMARC verlangt nicht nur, dass SPF oder DKIM besteht, sondern auch, dass mindestens eine der mit SPF oder DKIM genutzten Domains mit der Domain im From-Header übereinstimmt. Eine korrekte Übereinstimmung ist 2026 entscheidend für die E-Mail-Zustellung, denn die wichtigsten E-Mail-Anbieter setzen nun diese Anforderungen voraus.
Für SPF bedeutet Identifikationsabgleich, dass die Überprüfung von MAIL FROM/Return-PATH erfolgreich ist und dass der Domain-Teil von MAIL FROM/Return-PATH mit der Domain der From-Adresse übereinstimmt. Im Strict-Alignment-Modus müssen die Domains identisch sein, während im Relaxed-Alignment-Modus auch Subdomains akzeptiert werden, sofern sie zur gleichen Organisationsdomain gehören.
Beispiel: Ist der MAIL-FROM/RETURN-PATH @ondmarc.com und der From-Header @knowledge.ondmarc.com, sind sie im Strict-Mode nicht aligned. Im Relaxed-Mode würde DMARC die E-Mail jedoch validieren.
Ein DMARC-Aggregatbericht enthält Informationen zum Authentifizierungsstatus von Nachrichten, die im Namen einer Domain gesendet wurden. Es handelt sich um einen XML-Bounce-Report, der einen Überblick darüber gibt, welche E-Mails SPF und DKIM bestanden oder nicht bestanden haben. So erhalten Domaininhaber genaue Einblicke, von welchen Quellen E-Mails im Namen ihrer Domain versendet werden und was mit diesen E-Mails geschieht (Policy des Empfängers).
Empfänger schauen hierzu auf den 'rua'-Tag Ihres DMARC-Eintrags, um die Berichte zu senden. Sie können das Aggregatbericht-Intervall mit dem Tag ri im DMARC-Eintrag festlegen (Standardwert: 86400 Sekunden, also 24h). Forensik-Berichte liefern deutlich detailliertere Informationen zu jedem Authentifizierungsfehler. Personenbezogene Daten werden entfernt, aber alle für die DMARC-Problembehebung nützlichen Informationen wie Header-Fehler für SPF/DKIM, vollständige Absenderadresse und Betreff werden übermittelt.
Die Empfangsadresse für DMARC-Forensik-Berichte wird per 'ruf'-Tag angegeben. Nicht alle Empfängersysteme unterstützen Forensik-Berichte. Red Sift OnDMARC ist eine der wenigen DMARC-Lösungen, die Forensik-Berichte empfangen kann – dank Partnerschaft mit Yahoo.
Ein SPF-Makro ist ein Mechanismus in SPF-Einträgen, mit dem wiederverwendbare Mengen von IP-Adressen festgelegt werden können. SPF-Makros bieten größere Flexibilität und Wartbarkeit, da Sie komplexe IP-Sets in einem Mechanismus definieren und in mehreren SPF-Einträgen referenzieren können. Beispiel: Statt jede zugelassene IP einzeln aufzulisten, können Sie ein Makro wie „%{i}“ verwenden, das auf die ausgehende IP des E-Mails verweist. So behalten Sie leichter die Kontrolle über große IP-Listen, ohne das SPF-Lookup-Limit zu überschreiten, und verschleiern beim DNS-Lookup autorisierte IPs.
Je nach Aufbau des SPF-Makro-Eintrags kann fehlende Makro-Entwicklung jedoch zu SPF-Fehlern oder zu einem neutralen Ergebnis (?all) führen. Falls SPF-Makros für die Erlaubnis legitimer Sende-Server entscheidend sind, können E-Mails leichter an SPF-Kontrollen scheitern oder von SPF-basierten Systemen als suspekt eingestuft werden.
Mail Transfer Agent Strict Transport Security (MTA-STS) ist ein Standard zur Verschlüsselung von Nachrichten zwischen zwei Mailservern. Er teilt sendenden Mailservern mit, dass E-Mails nur über eine sichere Verbindung mittels Transport Layer Security (TLS) übertragen werden dürfen und schützt so vor Abfangen durch Cyberkriminelle.
Die Einführung von MTA-STS hat deutlich zugenommen; Organisationen werden 2026 Transportsicherheit als unerlässlich für den Schutz von E-Mails im Transit betrachten. Zur Aktivierung von MTA-STS auf einer Empfängerdomain müssen Sie die Unterstützung per DNS bekannt machen und eine Policy-Datei auf Ihrer Website bereitstellen.
MTA-STS sollte vorsichtig aktiviert werden, um nicht unbeabsichtigt die E-Mail-Zustellung zu blockieren. Es empfiehlt sich, den Modus Test zuerst zu verwenden, damit Sie mit Hilfe von TLS-Berichten Fehler aufdecken und beheben können, bevor Sie den strikten Modus aktivieren. Dieses schrittweise Vorgehen wird 2026 voraussichtlich zum Standard für sichere E-Mail-Transportsicherheit.
SMTP TLS Reporting (TLS-RPT) dient laut RFC8460 dazu, TLS-Konnektivitätsprobleme von sendenden MTAs zu melden. Wie bei DMARC werden auch hier Berichte per E-Mail an den Domaininhaber gesendet, wenn TLS-Probleme die Zustellung verhindern. Die Berichte enthalten erkannte MTA-STS-Policies, Traffic-Statistiken, fehlgeschlagene Verbindungen und Fehlerursachen.
Mit der MTA-STS-Funktion in Red Sift OnDMARC müssen Sie sich nicht um komplexe Bereitstellungen kümmern. Sie fügen die von OnDMARC bereitgestellten MTA-STS Smart Records zu Ihrem DNS hinzu und Red Sift übernimmt das Hosting der MTA-STS-Policy-Datei, das SSL-Zertifikatmanagement und meldet gefundene Verstöße automatisiert per TLS-Bericht. 2026 gehört gehostetes MTA-STS bei modernen DMARC-Plattformen immer öfter zum Standard, was die Einführung der Transportverschlüsselung deutlich vereinfacht.
Gemäß RFC 7671 ist DANE (DNS-based Authentication of Named Entities) ein neuer Internetstandard zur Etablierung von TLS-Kommunikation zwischen Client und Server ohne Abhängigkeit von klassischen Certificate Authorities (CAs).
Im traditionellen Modell kann jede CA für jede Domain ein Zertifikat ausstellen. DANE verfolgt einen anderen Ansatz und nutzt die DNSSEC-Infrastruktur (Domain Name System Security Extensions), um einen Domainnamen kryptografisch mit einem Zertifikat zu verbinden. DANE nutzt das bestehende DNSSEC-Protokoll, um Empfangs-Authentizität und Integrität zu gewährleisten.
DANE führt außerdem einen neuen DNS Resource Record Typ TLSA ein, der dem Client signalisiert, dass der Server TLS unterstützt. Es wird empfohlen, sowohl MTA-STS als auch DANE einzurichten. DANE ist für zahlreiche Behörden verpflichtend, insbesondere in der EU für öffentliche Einrichtungen.
DANE und MTA-STS sind nur dann sinnvoll, wenn auch der Versandserver die Mechanismen unterstützt – viele implementieren jedoch nur einen der beiden Ansätze. Beide Standards zu aktivieren, erhöht daher die Gesamtsicherheit. 2026 setzen Organisationen häufig zuerst MTA-STS zur maximalen Kompatibilität ein und ergänzen anschließend DANE, wenn ein höheres Sicherheitsniveau gefordert wird.
Die Subdomain-Policy ermöglicht es Administratoren, verschiedene Domains und Subdomains je nach Stand der DMARC-Einführung individuell zu schützen. Wenn beispielsweise alle Ihre Versanddienste für die Hauptdomain richtig mit SPF und DKIM abgesichert sind, können Sie Ihre Hauptdomain mit einer DMARC-Policy p=reject schützen, für Subdomains aber p=none einsetzen – oder umgekehrt.
Wenn ein Versanddienst kein DMARC unterstützt (also kein SPF oder DKIM implementiert), können Sie diesem Dienst eine eigene Subdomain mit separater DMARC-Policy zuweisen, ohne den Schutz der übrigen Domains zu beeinträchtigen. Dadurch können Sie den Traffic auf verschiedene Subdomains verteilen und jede je nach Bedarf absichern.